This article describes how you replace the CD drive unit in a Pioneer CDJ-800. It isn't very difficult, but the aim of the article is so that you won't have to do all the wrong things I did. :)
There is a service manual but you'll have to pay money for it - I couldn't find a pirate copy anywhere, wtf. So rather than doing that, you can use this page.
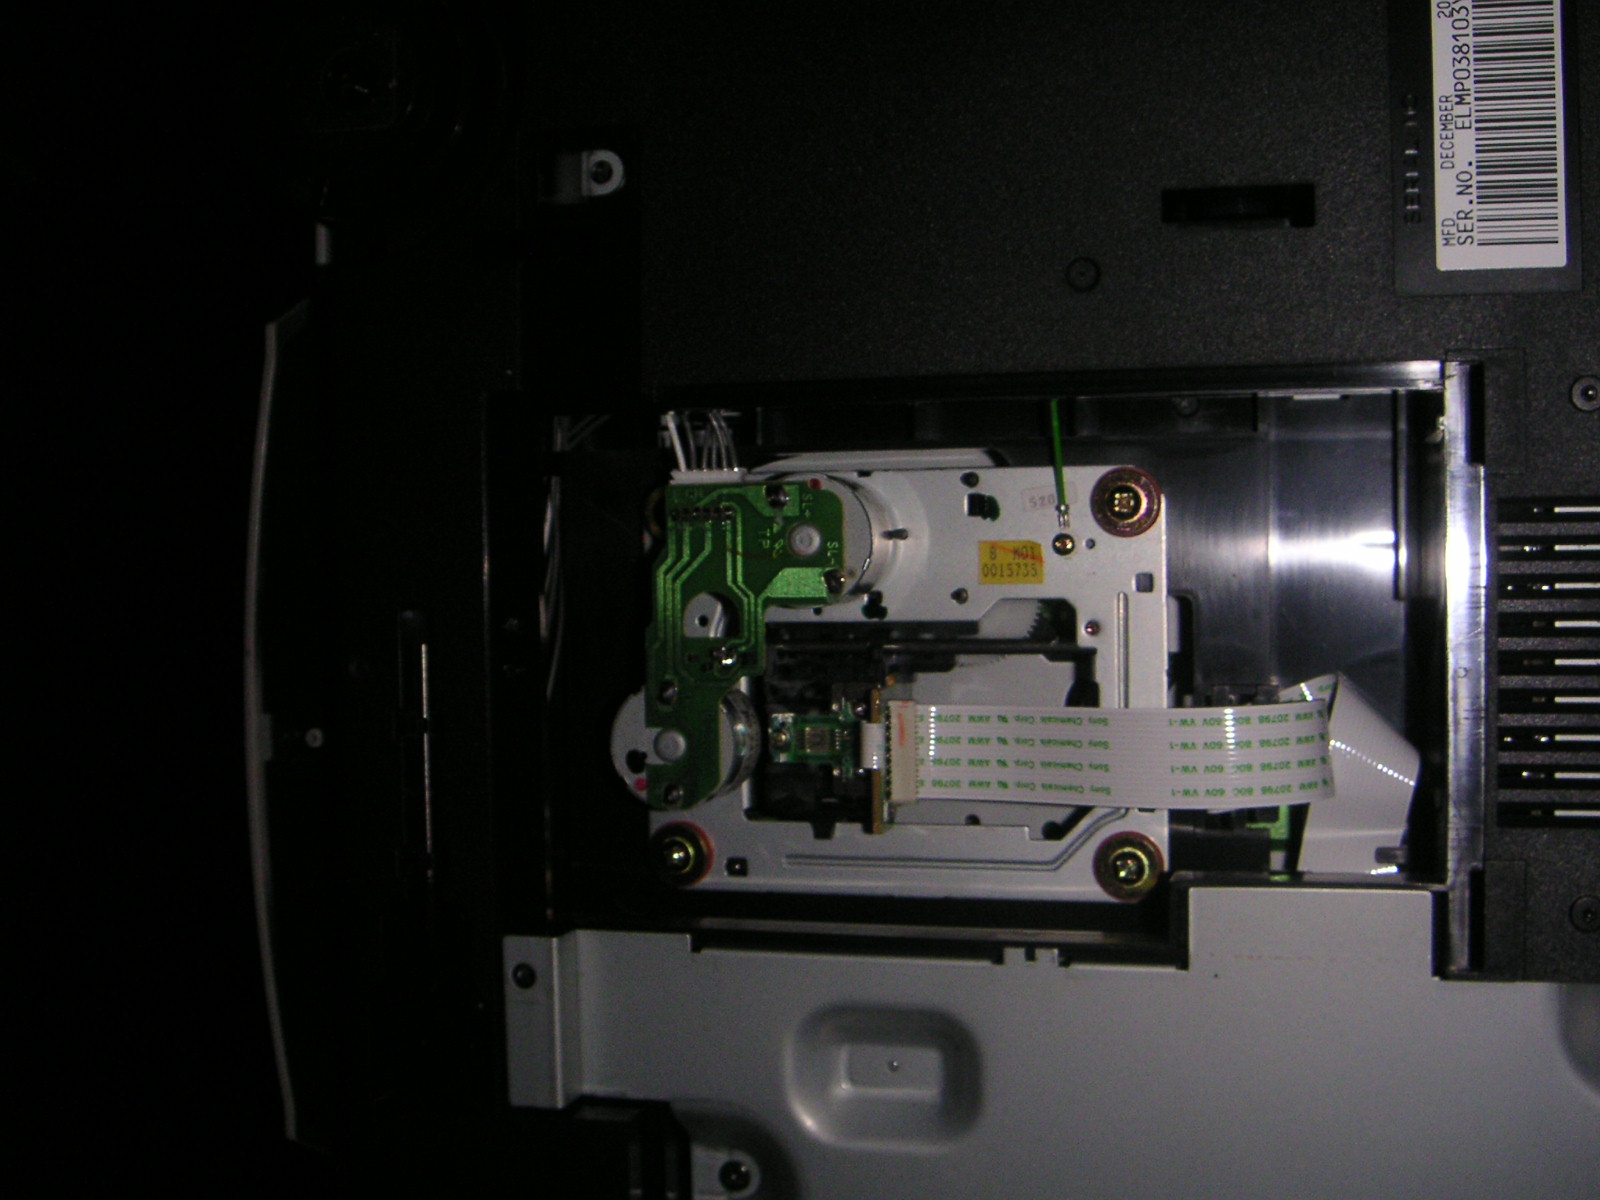
There were no photos, because I couldn't be arsed. But then somebody called Fabien sent me a photo, so I put a link in below. (Thanks!)
I take no responsibility if these instructions are totally wrong and you break your CD deck. Mine works (so far), but maybe this is a crazy way to do it and yours will break. Tough! You were warned. Follow these instructions at your own risk.
If your CDJ-800 stops working then maybe you need to replace the drive unit, or clean the lens. For example, if you put a disc in but it doesn't spin up.
The new drive unit has a few interesting points.
Read through all these instructions before you start! I might have put something in an unhelpful order.
Unplug everything (duh) and turn the player upside-down. You'll see a metal plate on the bottom of the player which contains the CD laser warning information. It is secured by three screws. Unscrew these and put them somewhere safe. The plate then unclips and lifts off.
Behind the panel you'll see the old drive unit. (If you look at the new drive unit you should see it looks the same.) It is secured by four large screws around red washers at each corner. There's a green wire (earth, presumably) attached by a little clip to one of two little holes in the unit's circuit board.
Now would be a good point to take a photo of it so you know how it's supposed to look like.
Because the drive is mounted on shock absorbers it will move so you will probably need to hold onto something while unscrewing things. Try to hold something that won't damage it.
If you don't have a new drive unit but just want to clean the laser lens, you can easily do that now. Some sites suggest using isopropyl alcohol (whatever that is) on a cotton bud (I know what that is), but you'd better google for information first in case I remembered that chemical name wrong and you're actually supposed to use, I dunno, Southern Comfort. Then you can put things back together and see if that helped.
Before you put in the new drive unit you need to sort out a couple things.
According to this page you need to desolder a very small jumper on the drive head. I confirmed this by looking at the old drive unit: the jumper wasn't soldered. Also according to that page, you should do this after connecting the ribbon cables. I don't know whether that matters or not (it certainly makes it a lot more difficult) so if you feel lucky, go ahead and do this bit earlier before you install the new unit, but don't blame me if that breaks it somehow.
The very small jumper is on the tiny circuit board of the drive head, just by one end of the ribbon connector. You're looking at the green side; if you look at it so that the ribbon connector is vertical at the right-hand end of that circuit board, then there's a little blob of solder going horizontally on the right and extreme bottom of the board. See the picture above (if the link still works). You can also do what I did and look at this on the old drive unit to make sure that it looks different (the solder has been removed).
To desolder it you heat up the solder and then try to suck it up with the desoldering springy thing. If you're as crap as I am, give it a few goes and expect to be a contortionist in order to even reach it. Try not to burn anything else with the soldering iron. (By the way, you can get self-heating desoldering tools. Maybe these are easier to use since you don't have to try and get two tools into the same place at the same time - or maybe they're crap and don't work. I have no idea.)
Once you think you're done, use the multimeter or some other safe way to check whether there's a connection between the left and right-hand pins of the jumper. I did a frankly crap desoldering job and was shocked that there was no connection between all the remaining solder, but there wasn't (it had encrusted mainly into two separate blobs).
Finally! Put the metal plate back into place (get the right-angle hooks in the right place then push the top part into position, it should clip in, there's a noticeable click) and screw it in. Now you can turn your player on and try it.
Yeah, mine was. It turned out that in some earlier screwing about I had accidentally pulled on a ribbon cable and disconnected the other end. That was in a circuit board accessed via the other metal plate on the back (which you can get at by undoing all the screws AFTER you again remove the first plate as above). It was easy to see that the cable was just hanging loose near where it should have pushed home.
If that's not it you could try opening up the main part of the player to see if there's anything obviously loose. Failing that, sorry I have no idea, I guess something else is wrong with the player, you now have to pay for repair or ditch it.
If you need to do this, there are five black screws on the back (not the ones that secure the legs! next to the legs, plus one just by the CD slot) and one silver screw on the back panel. Removing all these will let you carefully lift the top of the player off (it is attached by a ribbon cable, so you'll want to turn it over to the left).
There are a few more fun bits you can unscrew once you get in there, but I wouldn't recommend it unless you have a good reason.
I hope that was helpful! If you liked it, erm, don't forget to visit leafdigital.com for all your nothing-to-do-with-CD-decks-or-DJing needs! For instance I make an IRC chat client. Yeah. You probably want one of those. Or maybe not.